
Before You Get Started
Minecraft Setup
Confirmation
Installation Guide
Here is a video guide detailing how to setup everything required for the AI Companion Mod. Alternatively, you may read the written guide below.
Here’s a checklist of everything you should have setup/downloaded:
Downloads/Tutorials for these respective files can be found by clicking on them.
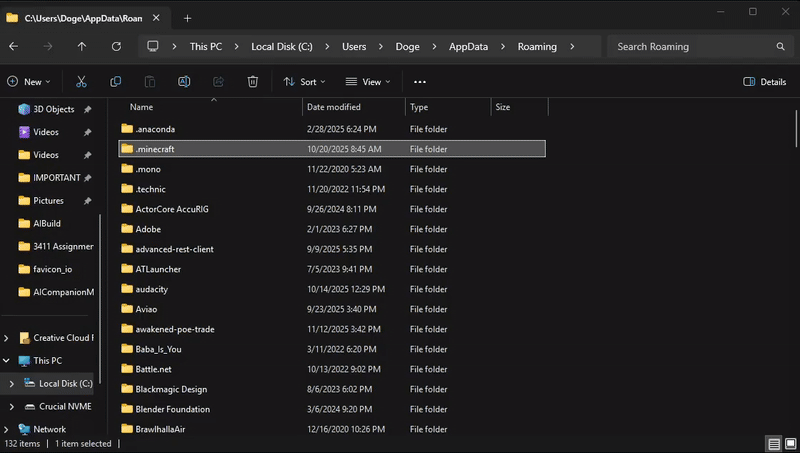
Now that you have forge installed, you can simply navigate to your Minecraft installation folder and place the mod jar file into the mods folder. Your Minecraft installation folder can be found by clicking the windows button, then typing %appdata%.
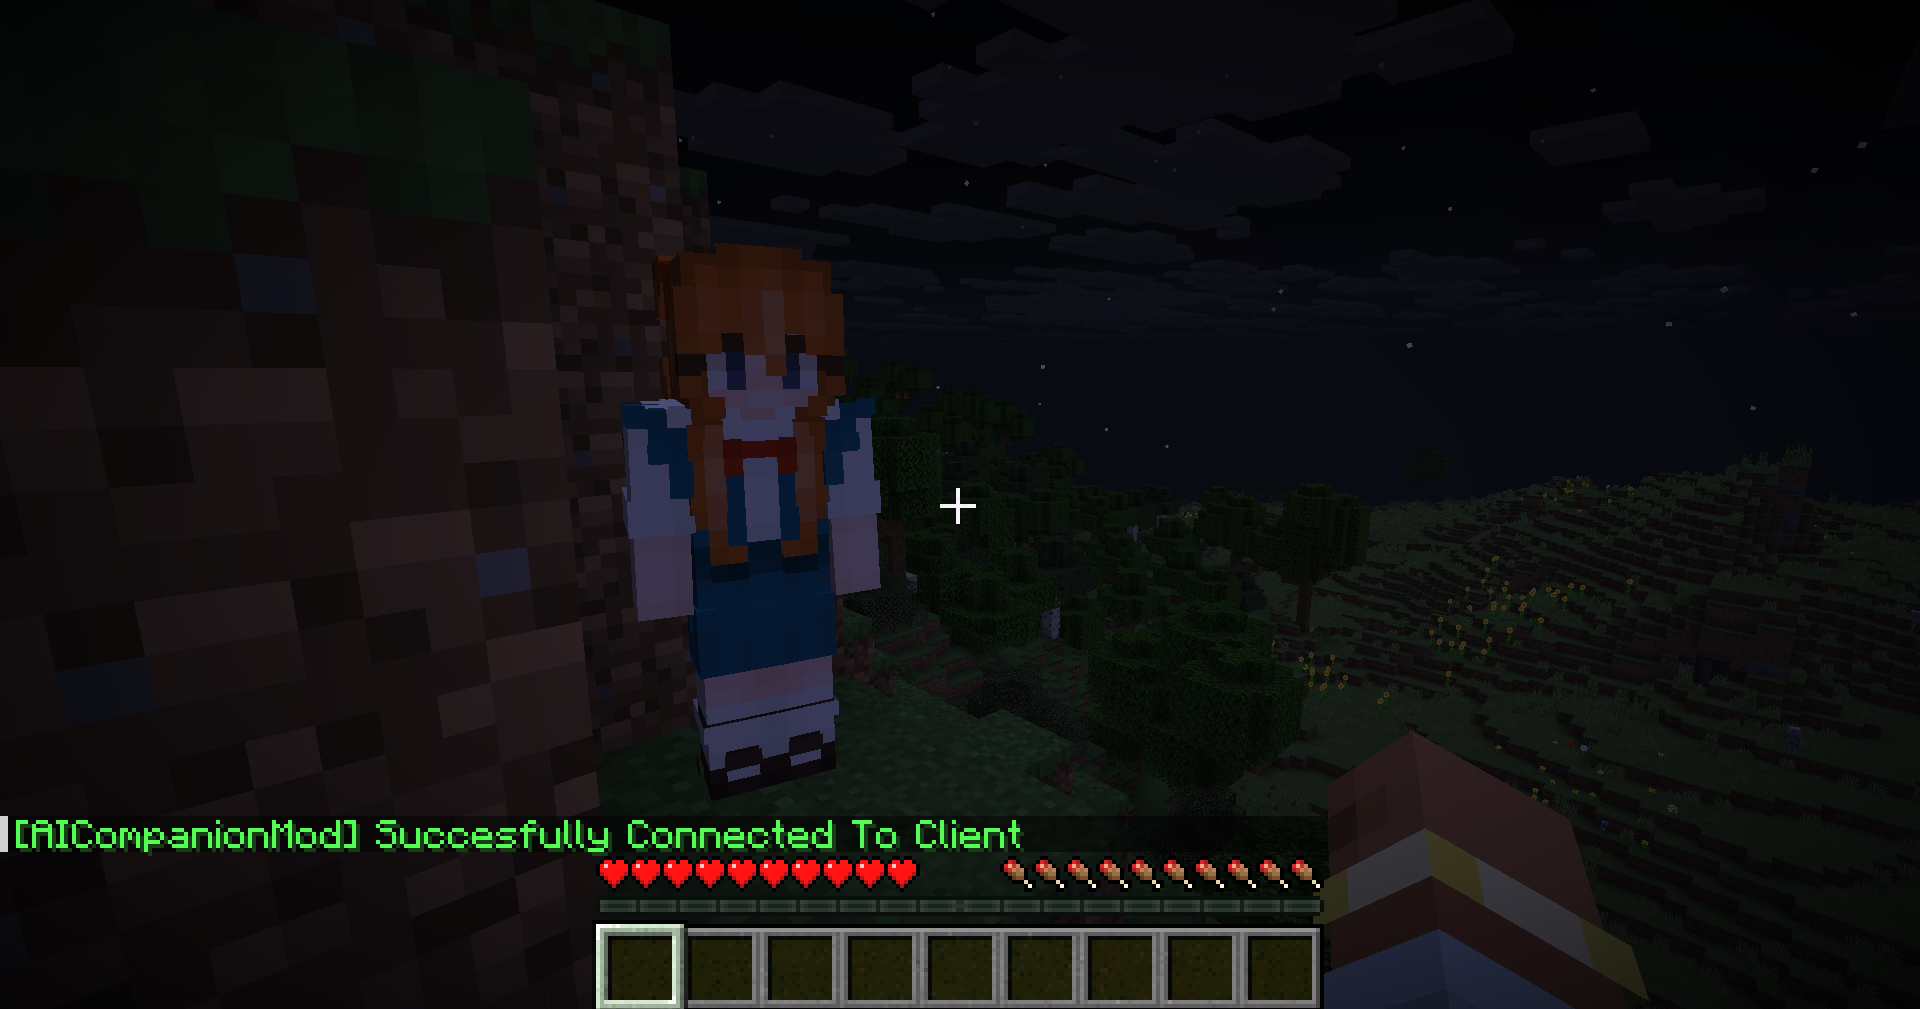
To confirm the mod and forge have been setup properly, launch minecraft and create a new world. You should be able to see the companion next to you, as well as an error message in the chat. If not, you have setup forge wrong or placed the mod in the wrong place and should double check this.

Server Setup
API Key Setup
The next step is to setup the server app. Upon running the executable file, you should see an app which looks like this. Before starting the server, you’ll need to properly setup your API keys.
ElevenLabs
To create an ElevenLabs API key, head here. When creating your API key, make sure to enable Text To Speech permissions or else you will get an error. Note that the ElevenLabs API comes with a free trial, but after that you will have to pay and add credits.


Importing Your API Keys
Next you will need to import your API keys to the server app. To do this, navigate to the settings tab. Paste in your two API keys and then click the refresh button to save them. You will only need to do this once and in future, your API keys should automatically be loaded upon opening the app. If you wish to clear the API key you have currently set, simply click the clear button.
Starting The Server
If you have done everything correctly so far, you should be ready to start the server. Navigate back to the console page of the app and click the green “Start” button. Any errors the server app encounters will be logged in red in the terminal on the right of the app. A list of commonly encountered errors and their solutions can be found here. Finally, back in Minecraft run the command
/retryConnection ws://127.0.0.1:8000
And the companion should now successfully receive all your actions and respond accordingly. Check out here for a list of everything the companion can do, here for how you can customise it and here for solutions to any errors you may encounter.